Awarded Top 4 Education Facility in Australia by the MAGAP (Asia Pacific)


The most polished hairstyle doesn’t always come from the most complicated method. A blow-dry, a set of curls or a simple braid can look and feel completely different depending on your hair’s texture, length and the finish you want. If you’ve ever wondered which hairstyling techniques to try, or why a style loses its volume or smoothness too soon, you’re not alone.
Choosing a method gets easier when you start with your hair and the occasion, rather than copying a look step by step. This guide covers foundational hairstyling techniques and explains what each can help you achieve, so you can choose an approach that suits your texture, preferred finish and plans.
From preparing your hair and creating shape to helping a style hold, you’ll find practical pointers for building confidence through manageable practice. Whether you’re styling your own hair or exploring skills for a future in beauty, use these steps as a starting point, then adapt them to what works for you.
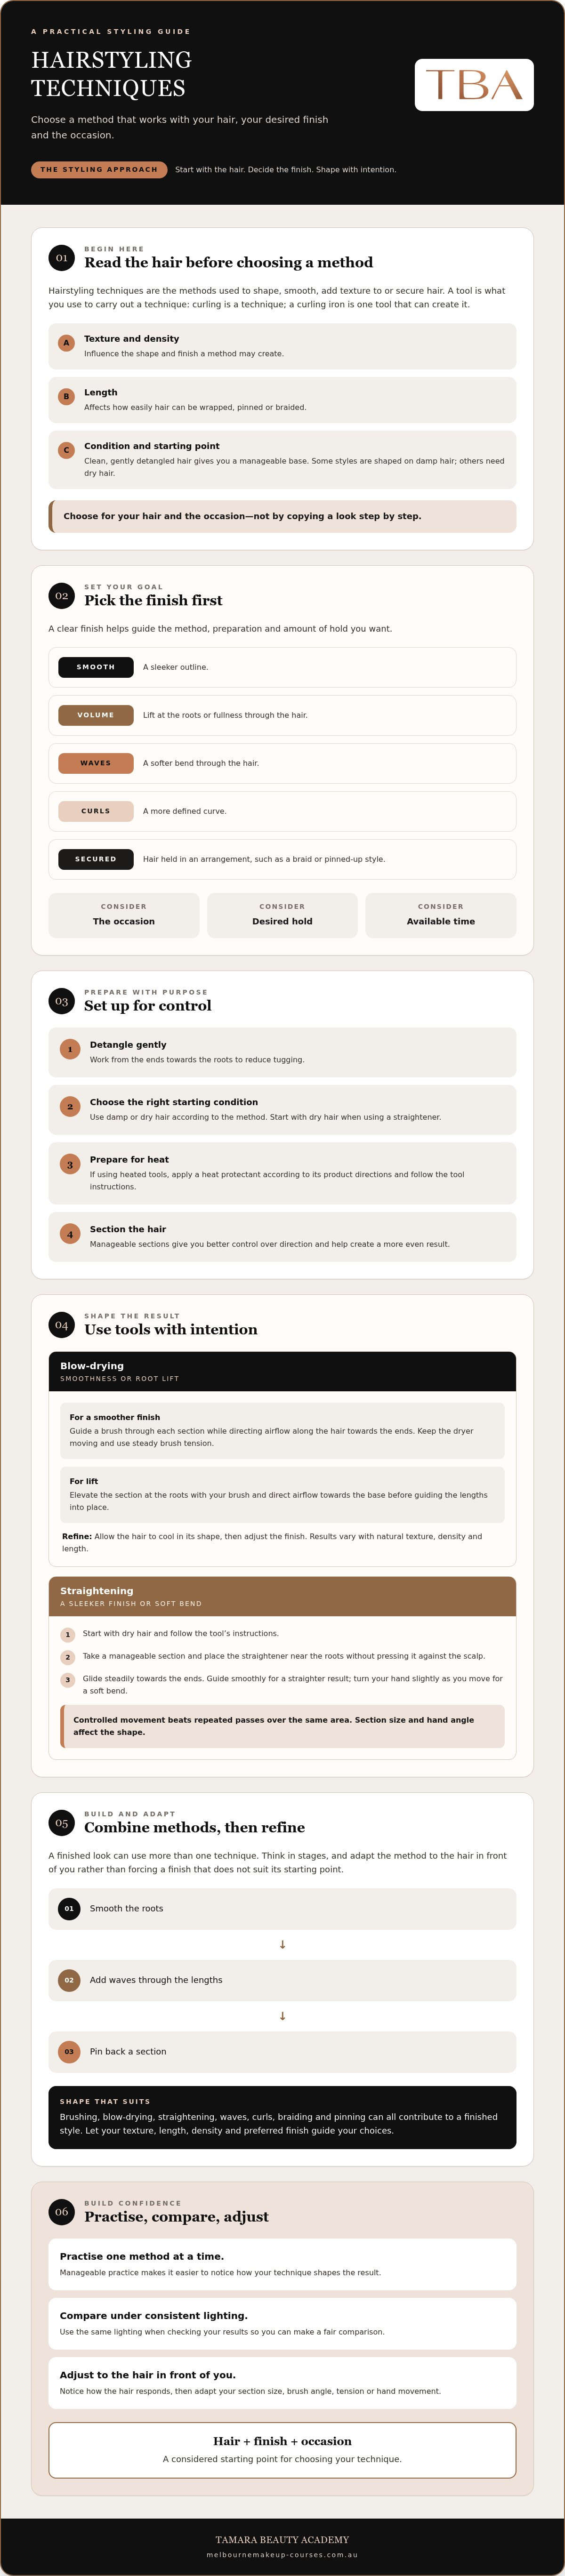
A polished result starts before you pick up a brush or heated tool. Hairstyling techniques are the methods used to shape, smooth, add texture to or secure hair; a tool is what you use to carry out a technique. For example, curling is a technique, while a curling iron is one tool that can create it. Understanding the difference helps you choose a method for the look you want, rather than letting your equipment make the decision for you.
Start by considering the hair in front of you. Length affects how easily hair can be wrapped, pinned or braided. Density and natural texture influence the shape and finish a method may create. Clean, gently detangled hair gives you a manageable starting point, while its condition can help you decide how to prepare it. For a broader overview of approaches such as braiding, curling and straightening, see Hairstyling techniques.
Watch this professional tutorial for an example of how a defined finish can guide the styling process:
Detangle gently, working from the ends towards the roots to reduce tugging. Choose a starting condition that suits your method: some styles are shaped on damp hair, while others need dry hair. If you’re using heated tools, apply a heat protectant according to its product directions. Then divide the hair into manageable sections. Sectioning gives you better control over the direction of each section and helps create a more even result.
Picture the result first. Smooth hair has a sleeker outline; volume lifts the roots or builds fullness; waves create a softer bend, while curls form a more defined curve. A secured finish holds hair in an arrangement, such as a braid or pinned-up style. Consider what the occasion calls for, how much hold you want and how much time you have. Your hair’s length and natural texture can affect what’s practical, so adjust the method rather than forcing a finish that doesn’t suit your starting point.
A finished look can combine methods. You might smooth the roots, add waves through the lengths, then pin back a section. Thinking in stages makes styling more deliberate and gives you room to adapt as you work.
With your finish in mind, use your brush and heated tools to guide the hair into shape rather than simply applying heat. Blow-drying can smooth the lengths, direct hair into a chosen shape or create lift at the roots. A straightener can also shape hair, adding a bend or soft curve as well as creating a sleeker finish. These hairstyling techniques are easier to control when you work with intention, section by section.
Section size and direction influence how much control you have over the shape of each section. Keep sections manageable so you can see how the hair responds and adjust your brush angle, tension or hand movement as you go.
For a smoother finish, guide a brush through each section while directing airflow along the hair towards the ends. Keep the dryer moving and use steady brush tension to shape the lengths. To build lift, elevate the section at the roots with your brush and direct airflow towards the base before guiding the lengths into place. Work in manageable sections, then allow the hair to cool in its shape before refining the finish.
Begin with dry hair and follow the tool’s instructions for use. Take a manageable section and place the straightener near the roots without pressing it against the scalp. Glide it steadily towards the ends, keeping your movement controlled rather than repeatedly passing over the same area. For a straighter result, guide the tool smoothly down the section; for a soft bend, turn your hand slightly as you move. Section size and hand angle both affect the shape.
Root-lifting won’t create the same result for every head of hair. Natural texture, density and length all influence how much volume a brush-and-dryer approach creates, so adjust the section and lift to suit the hair in front of you. Check the tool guidance and consider the hair’s needs when choosing settings; there isn’t one temperature that suits everyone. A deliberate, controlled pass is a better starting point than relying on repeated heat.
Developing this control takes practice. If you’re exploring professional education and industry resources, the Professional Beauty Association offers another perspective on the beauty industry. For structured learning in Melbourne, you could also explore hair styling course options as you build your practical skills.
The right approach depends on the shape you want and how your hair naturally behaves. Curls are usually more defined bends, while waves form a looser, softer pattern. Section size and the direction you shape each section can change the result: smaller sections often create more definition, while larger sections can produce a more relaxed effect. Brushing or separating the finished shape softens the pattern, so refine it gradually.
Hair length, density, natural texture and existing curl pattern all influence how a method looks. A technique that creates defined curls on one head of hair may give another a softer bend or a different amount of volume. Use the comparison below as a starting point, not a promise of an identical result.
| Technique | Intended finish | Useful starting point | Care notes |
|---|---|---|---|
| Curling with a heated tool | More structured curls or bends | Dry hair, divided into sections that suit its density and the desired definition | Follow the tool’s directions and avoid repeatedly working the same section. |
| Braiding or twisting | A softer wave or visible texture | Sections arranged in the direction and size of the wave you want | Allow hair to dry fully before undoing, and separate gently to preserve the shape. |
| Enhancing natural curls | More defined existing curl pattern | Work with the hair’s natural texture and use a suitable styling product as directed | Handle curls gently; brushing them out may loosen or change their definition. |
Start by observing the hair’s natural pattern rather than forcing every texture towards the same finish. Fine or lower-density hair may need a lighter touch to avoid flattening its shape, while dense hair can be easier to manage in smaller sections. Longer hair may weigh down a wave or curl, while shorter lengths can make the same shaping movement appear more pronounced. These are useful considerations, not fixed rules.
If you’re trying an unfamiliar approach, test a discreet section first. Notice how the hair responds, then adjust the section size, shaping direction or amount of separation before continuing. This small trial can help you choose among hairstyling techniques with more confidence, whether you’re preparing a relaxed look for the day or a more defined style for a special occasion. Hair’s response can vary, and no method guarantees the same finish or lasting hold for everyone.
Braids and pins bring structure without relying on heated tools. A braid can add texture when loosened, or hold sections in a chosen arrangement as part of an upstyle. Pins secure the shape and help keep the finish tidy. Build the look in stages, checking its balance as you go rather than trying to perfect every detail at once.
A beginner-friendly styling sequence is: prepare the hair, section it, shape it, secure it, refine the details and check the finished look.
A basic three-strand braid is a useful foundation: cross the outside strands over the centre in turn, keeping the pattern even. Maintain consistent tension for a more uniform braid, but avoid pulling uncomfortably tight. For a softer effect, loosen the braid gently once it’s secured or vary the arrangement to create a more relaxed shape. Practise the hand movement on a small section before building it into a full style.
Gather the shaped sections and place pins so they catch a secure base of hair, rather than relying on surface tension alone. Add pins gradually, then check whether the upstyle feels stable and comfortable before using finishing products. Refine flyaways lightly and assess the shape from different angles. A little adjustment is often more effective than layering on product, which can weigh down the style or make details harder to refine.
These hairstyling techniques reward patience. Practise the sequence slowly, noticing how each braid or pin contributes to the overall shape. Once the steps feel familiar, you can adapt them for different textures, lengths and occasions. If you’d like guided practice to develop your styling skills, explore hair styling course options.
Confidence grows through focused repetition, not by mastering every style at once. Choose one manageable look and practise a single method, such as creating a smooth bend or securing a simple braid. Keep the other variables as consistent as you can, so you can see how your technique affects the result.
As you practise, note the section size, the direction you worked in and the finish you achieved. Record what felt straightforward, what was tricky and how well the shape held up over time. Take a photo under consistent lighting and from a similar angle each time. This makes it easier to compare results fairly, rather than relying on memory.
Keep your notes simple. If a curl looks looser than you wanted, for example, change one factor in your next attempt, such as the section size or shaping direction. Avoid changing several things at once, or it’ll be harder to tell what made the difference. Dexterity and consistency take time to develop. Treat each attempt as useful feedback, not a test you have to pass.
Once a method feels more familiar, build on it with another step, such as adding a braid or pinning a section into place. This gradual approach helps turn individual hairstyling techniques into a more complete look, while giving you a clear way to identify what still needs practice.
Independent practice can take you a long way, but guided demonstrations and feedback may help when you’re unsure how to improve your sectioning, hand position or finish. Structured learning can also offer a clear progression from foundational methods to more confident styling, whether your goal is personal skill-building or exploring a professional pathway.
Tamarua Beauty Academy is a Melbourne-based training institute offering hair styling courses, including on-site and live-online short courses. Training is an option, not a requirement: you can keep practising at your own pace, or explore hair styling courses for a more guided learning experience.
Polished results begin with a clear finish in mind, thoughtful preparation and a method suited to your hair’s texture and length. Whether you’re aiming for smoothness, volume, waves or a secured upstyle, manageable sections and deliberate movements give you more control. Practise one of these hairstyling techniques at a time, then notice what worked and refine your approach.
You can keep developing your skills independently, or explore structured guidance if you’d like demonstrations and hands-on learning. Tamara Beauty Academy offers hair styling courses and live-online short courses from Melbourne, with learning options for people in Melbourne city, Victoria’s eastern and western suburbs, Brimbank, Hobsons Bay, Maribyrnong, Melton and Wyndham.
Explore Tamara Beauty Academy’s hair styling courses to take a practical next step towards your styling goals. Every thoughtful practice session builds your confidence, one look at a time.
Start with detangling, sectioning, controlled blow-drying, simple braiding and basic pinning. These foundational hairstyling techniques help you smooth hair, add shape or texture, and secure sections without attempting a complex style straight away. Choose one method to practise at a time. For example, work on an even three-strand braid, then try using pins to secure a small section neatly and comfortably.
Choose a method by considering your hair’s length, density, natural texture and existing curl pattern, as well as the finish you want. For softer waves, try braiding or twisting; for more defined curls, use a suitable shaping method in manageable sections. Fine hair may respond differently from dense hair, so test an inconspicuous section first. Adjust the section size and direction based on the result rather than expecting one approach to work identically for everyone.
Yes, you can create curls or waves without a curling iron by braiding or twisting hair and allowing it to dry fully before undoing it. Smaller sections tend to create a more defined pattern, while larger sections can produce a looser effect. The result depends on your hair’s texture, length and starting condition, so it may vary from one person to another. Separate the shape gently if you want a softer finish.
A blow-dry describes drying hair with a hair dryer, often while using a brush to direct and shape it. A blowout generally refers to a more finished, styled result created during the drying process, such as smooth lengths, root lift or a rounded shape. The terms can be used differently by different people. In either case, brush tension, airflow direction and section size help guide the outcome.
Begin with hair prepared for the method you’re using, then work in manageable sections so you can shape and secure each part carefully. Let shaped sections cool before brushing or separating them, and use pins that anchor into a secure base for an upstyle. Choose finishing products suited to your hair and follow their directions. Hold can vary with hair texture, weather and the style itself, so no method guarantees the same lasting result for everyone.
Using a heat protectant is a sensible step when styling with heated tools. Apply it according to the product directions, and check that the hair is in the condition recommended for the tool before styling. Follow the tool maker’s guidance for use and settings, as there isn’t one temperature or routine that suits every hair type. Keep the tool moving steadily and avoid repeated passes over the same section.
For structured learning in Melbourne, explore course content, teaching format and the kind of practice or feedback included before choosing a programme. Tamara Beauty Academy is a Melbourne-based beauty training institute offering hair styling courses and on-site and live-online short courses. Learners in Melbourne city, the eastern and western suburbs, Brimbank, Hobsons Bay, Maribyrnong, Melton and Wyndham can consider which learning option best suits their goals.